Wondering how to setup your new Instant Pot? Here’s all the information you need to get going!
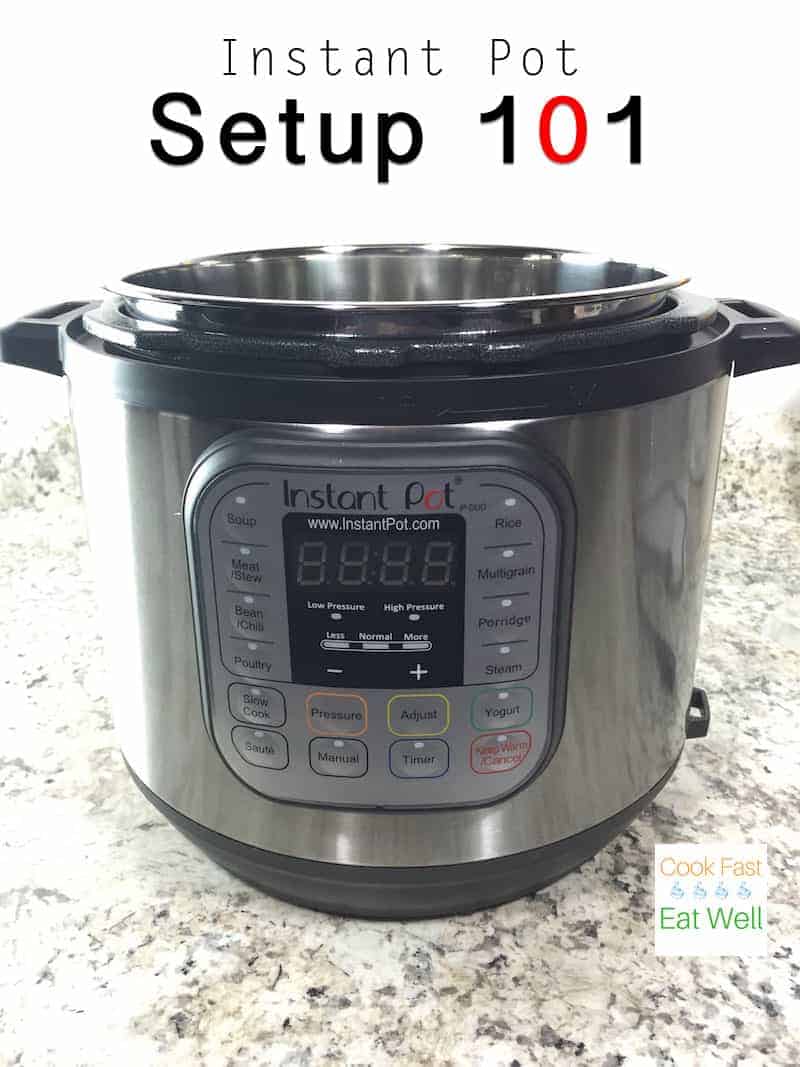
Ready to setup your new Instant Pot DUO? Here’s the step-by-step guide. We’ll look at everything from the manual (snore) to how to conduct the water test. Once you’ve finished the setup, you’ll be ready to start using your Instant Pot!
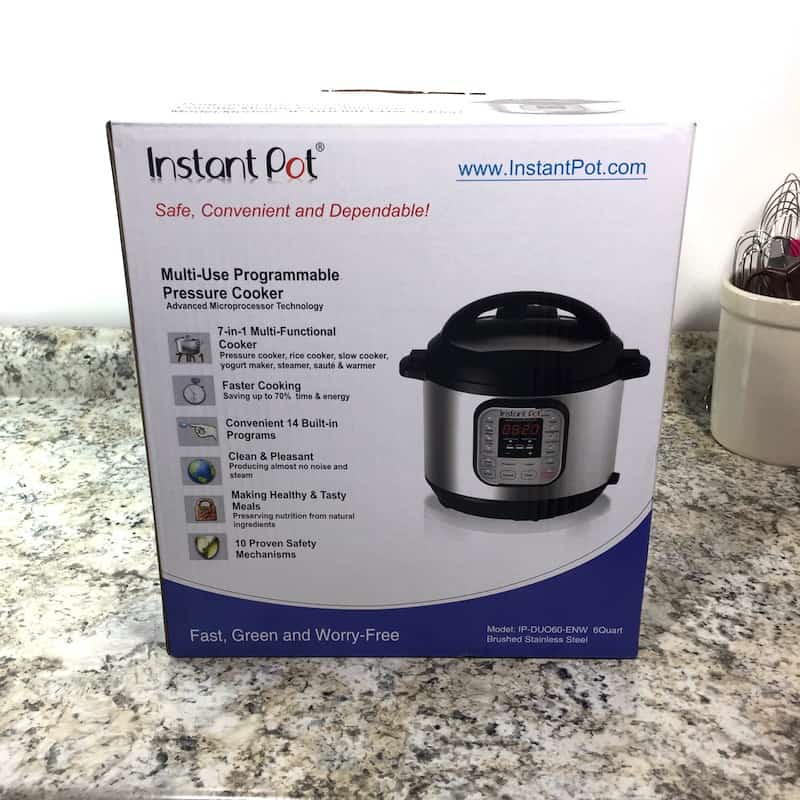
What an exciting sight. A new Instant Pot! I remember opening my first Instant Pot and thinking, “…and now what?”
To be honest, I found the setup process a little confusing. I (wrongly) thought that the minute I closed the lid and hit the start button, the machine would be under pressure. Here’s everything I wish I knew about setting up and using an Instant Pot.
Today we’ll walk through unboxing and setting up a six quart Instant Pot DUO. The basic setup up for the DUO and the Bluetooth Instant Pot is the same. The Instant Pot LUX has a slightly different lid and steam release valve than what you’ll see pictured here.
Note: the links above are affiliate links. If you use them, I earn a small commission from Amazon which supports the site. I only use affiliate links for products that I love, love, love.
Instant Pot Setup: Manuals and Accessories
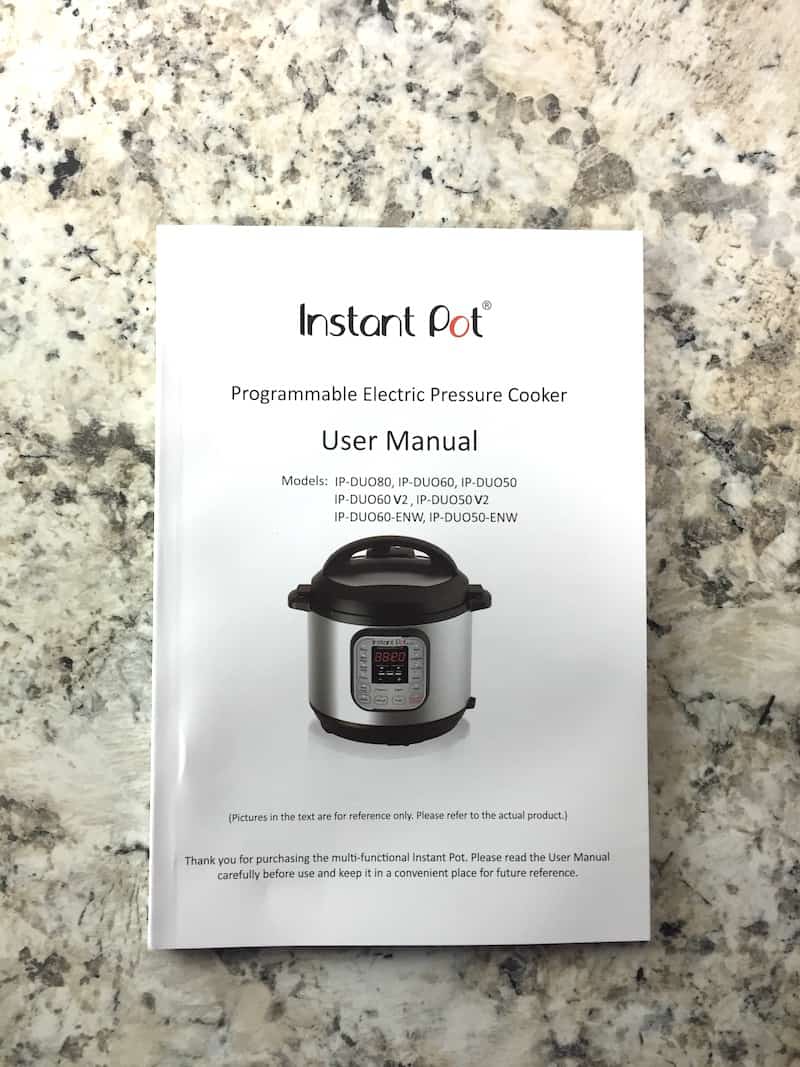
Ah, the manual. Here’s what usually happens with manuals in my house:
- Take it out of the box.
- Flip through quickly.
- Don’t really read it.
- Put somewhere “safe.”
- Never see it again.
- Google the manual when I need some help.
Does that sound familiar? Yes? That’s why we’re friends!
AnyWAY, I know it sounds boring but I urge you to read the Instant Pot manual. Modern pressure cookers are safe. However, they aren’t slow cookers. It’s important to understand the basic ins and outs of a pressure cooker before you use it.
Oh, and if you misplace it, you can find the Instant Pot manual online. (Thank goodness.)

Oh! Recipes! I love recipes. <—understatement. But…I must confess. I’ve never used this recipe booklet. The recipes didn’t really appeal to me and the directions were confusing.
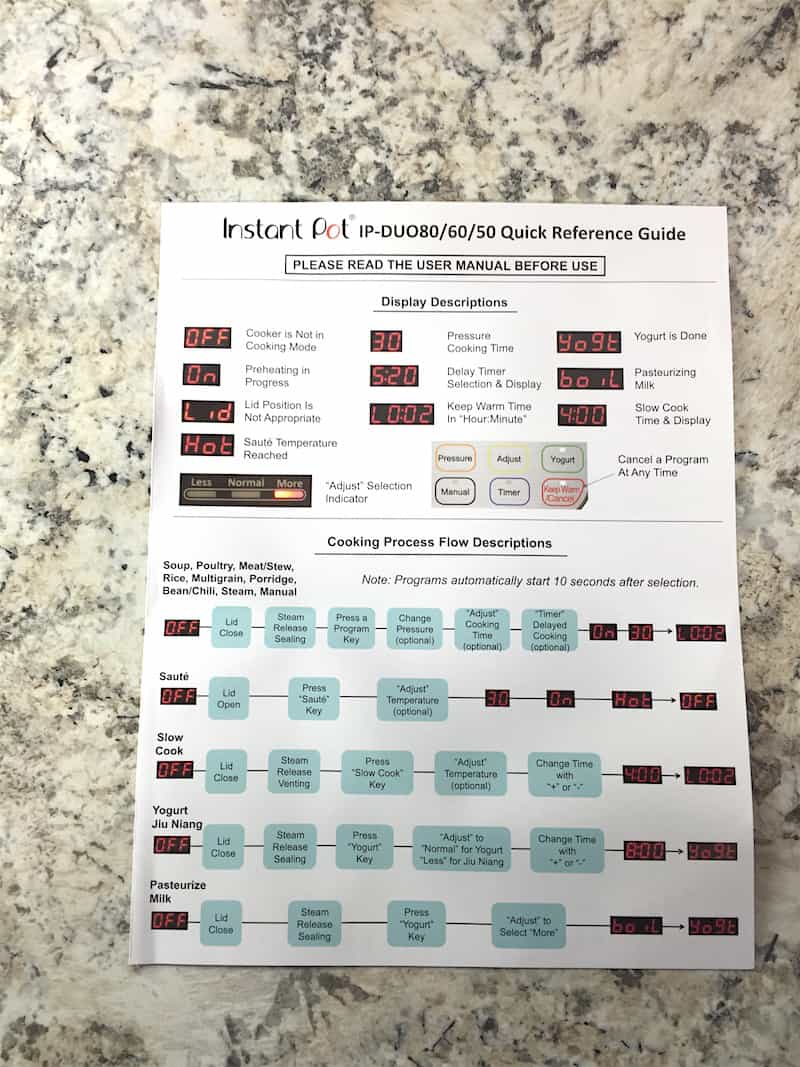
I wish this quick reference guide was handier than it is. As written, it shows the steps for using each function. However, it doesn’t explain cook time or the how to release pressure. I’m very “meh” on this guide. It could be so handy!
Question: do you use the free tools that come with appliances? I don’t think I’ve ever used them! And not just for the Instant Pot. Maybe I’m just weird.
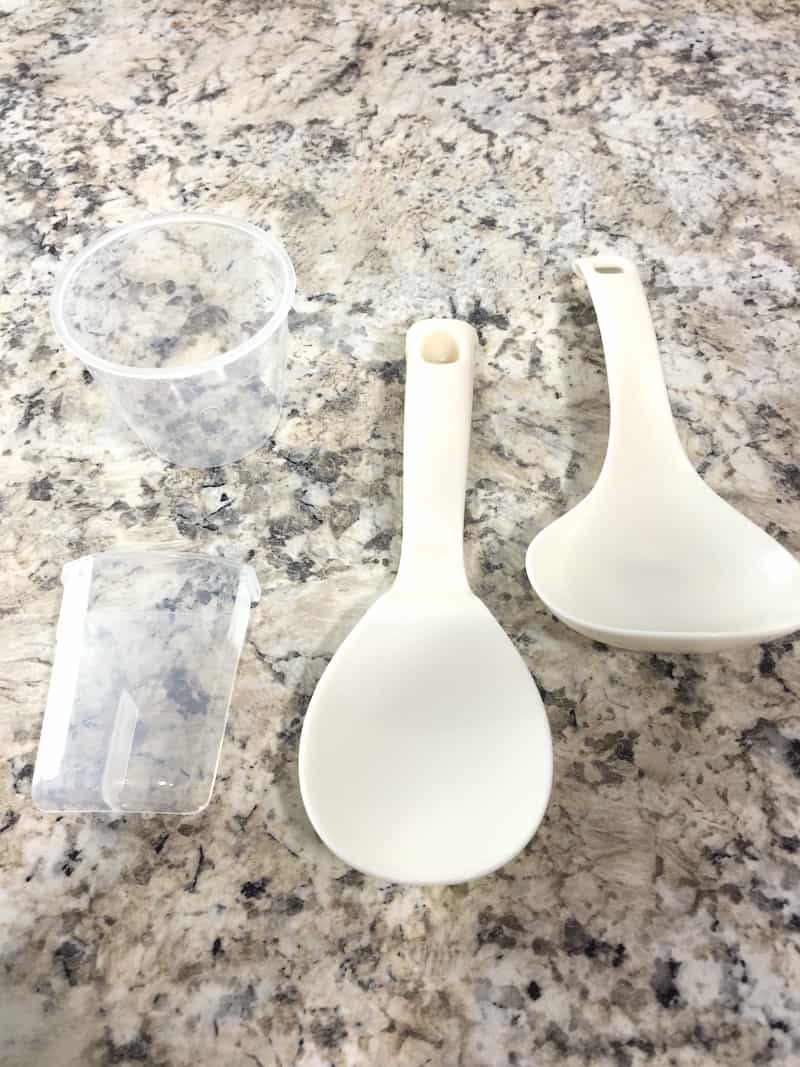
Let’s take a look at these: (clockwise from left) measuring cup, soup spoon, rice paddle, and a condensation collector.
Measuring Cup. If you don’t own a glass measuring cup for liquids, I urge you to get one. This measuring cup is flimsy and, without handle, hard to handle.
Soup Spoon. The handle on this soup spoon is so short that you risk dipping your knuckles into hot food when you use it. Use a regular ladle instead of this spoon.
Rice Paddle. Suffers from the same problem as the soup spoon. The handle feels too short for the pot. A rice paddle this size would fit nicely in a traditional rice cooker. The insert of the Instant Pot is too deep to use this easily.
Condensation Collector. This little cup hooks on to the side of the Instant Pot. It’s supposed to keep condensation from hitting your counter during cooking and cooling. Don’t toss this! I’ll show you how to put it on the Instant Pot below.
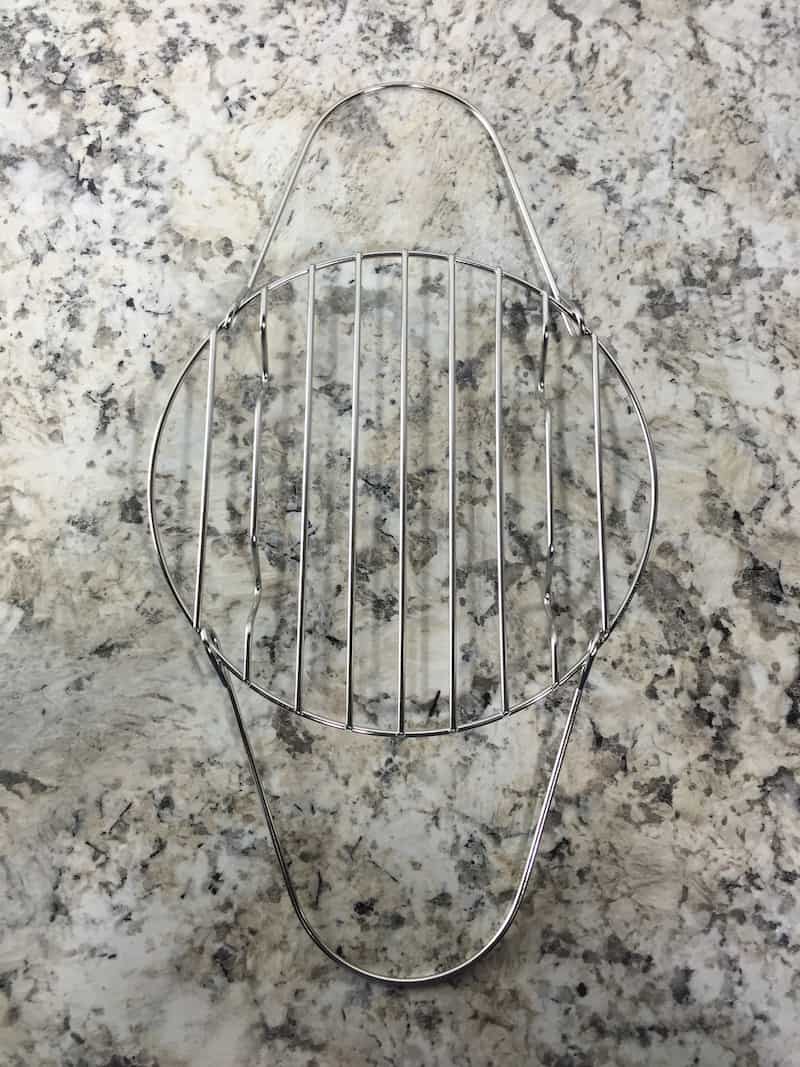
Now here’s a handy accessory! The steam rack. Use this to hold vegetables, pans (for when you make things like meatloaf or cheesecake), or anything else that you don’t want sitting in cooking liquid.
If your model didn’t come with a steam rack, consider getting one. They’re really handy. You might also want to pick up a steaming basket. Small vegetables and other foods tend to fall through the steam rack. To solve this problem, I put the steam rack in the Instant Pot and then I put a steamer basket on top of it.
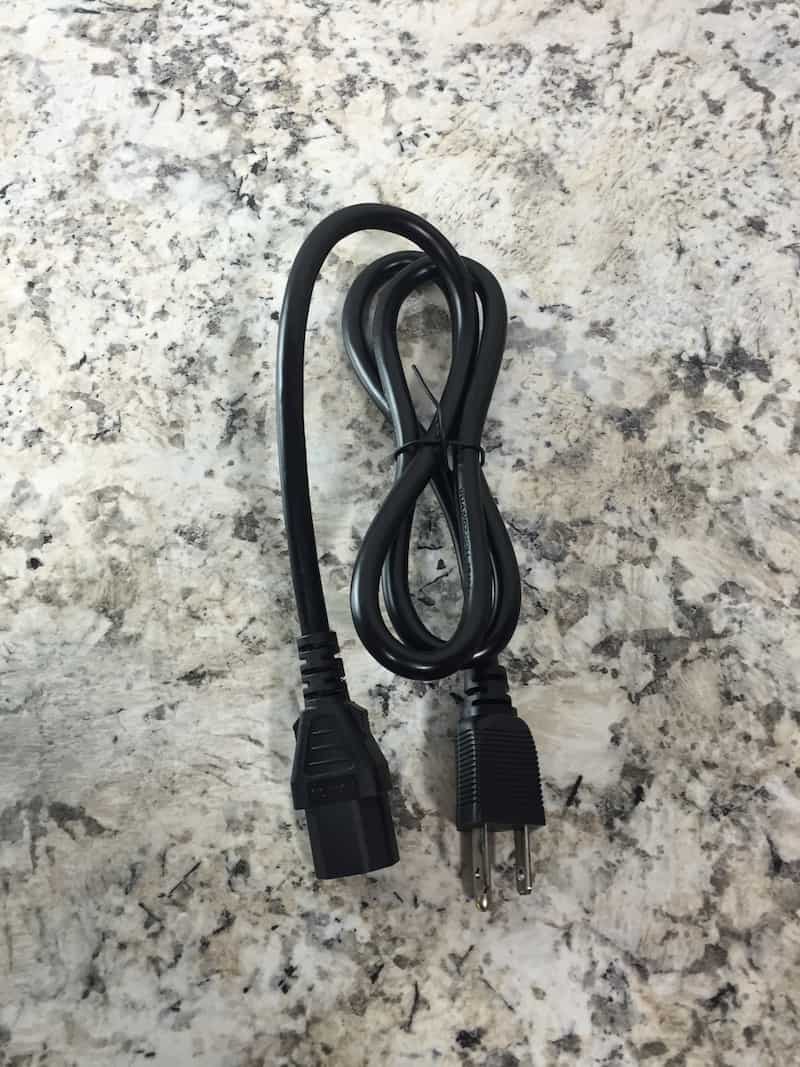
Second generation Instant Pots come with a detachable cord. (They’re fixed on the first generation.) If your cord isn’t detachable, don’t worry about it. In fact, I don’t love the detachable cord. I’m always afraid I’m going to misplace it.
Instant Pot Setup: Understanding the Lid
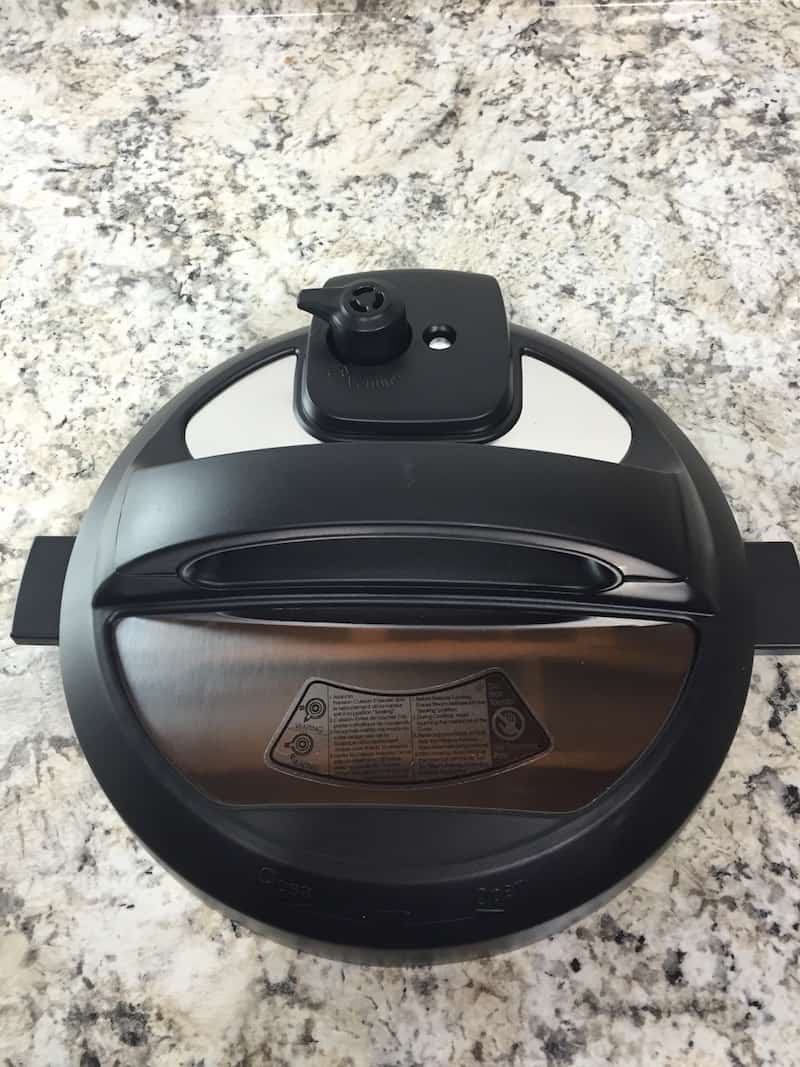
The lid of a pressure cooker is an integral part of the machine. Without this lid, you can’t cook foods under pressure.
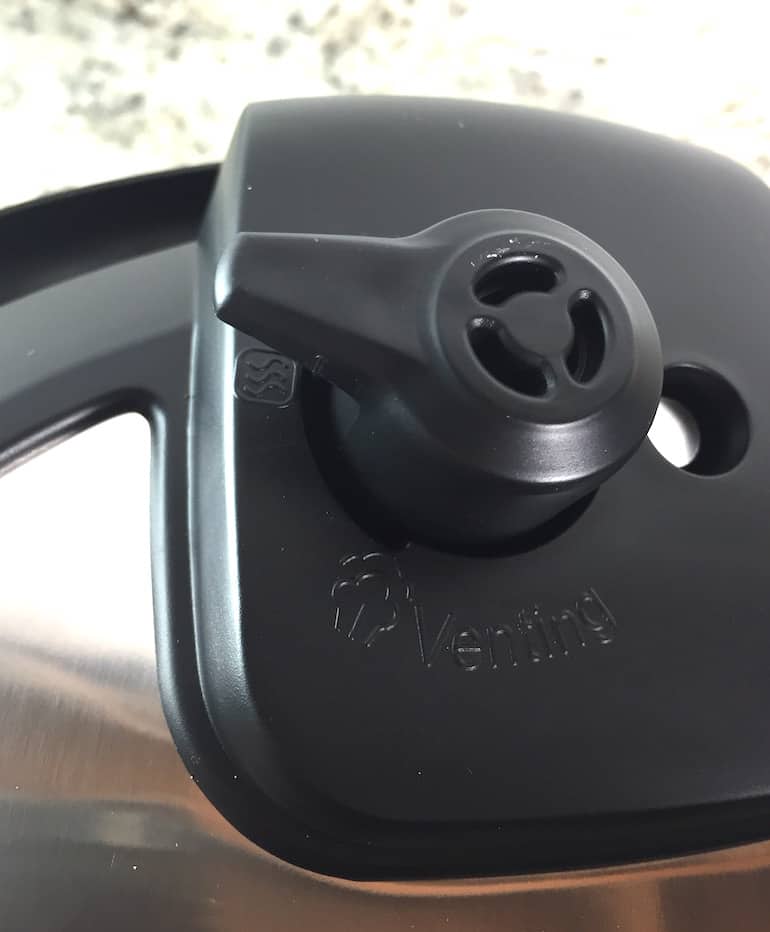
This is the steam release valve. It has two settings: sealing and venting.
Sealing: When cooking food under pressure, close the lid and line up valve with the “wavy” lines. This position seals the pot. It allows pressure to build as the food inside heats and produces steam. The valve won’t lock into place when set to sealing. For safety reasons, it will always wiggle a little.
To set the valve to the sealing position, turn it clockwise as far as it will go. (This is for DUO machines. LUX machines have a different sealing position.)
Venting: Once the pressure cooker completes its cooking cycle, you must vent it. This will either happen immediately after the cooking cycle completes (a quick release) or after the pressure releases slowly over time, about ten minutes. (a natural release.) You MUST vent the pot before opening.
To do that, turn the steam release valve toward venting (icon that looks like a Chef’s hat or puff of steam). NEVER place your hand over the steam release valve. Use the small handle to turn the valve and keep your hand off to the left side. When doing a quick release, steam rushes out of the valve. For a natural release, no steam usually escapes. But it’s a good idea to vent it just in case there’s any pressure remaining.
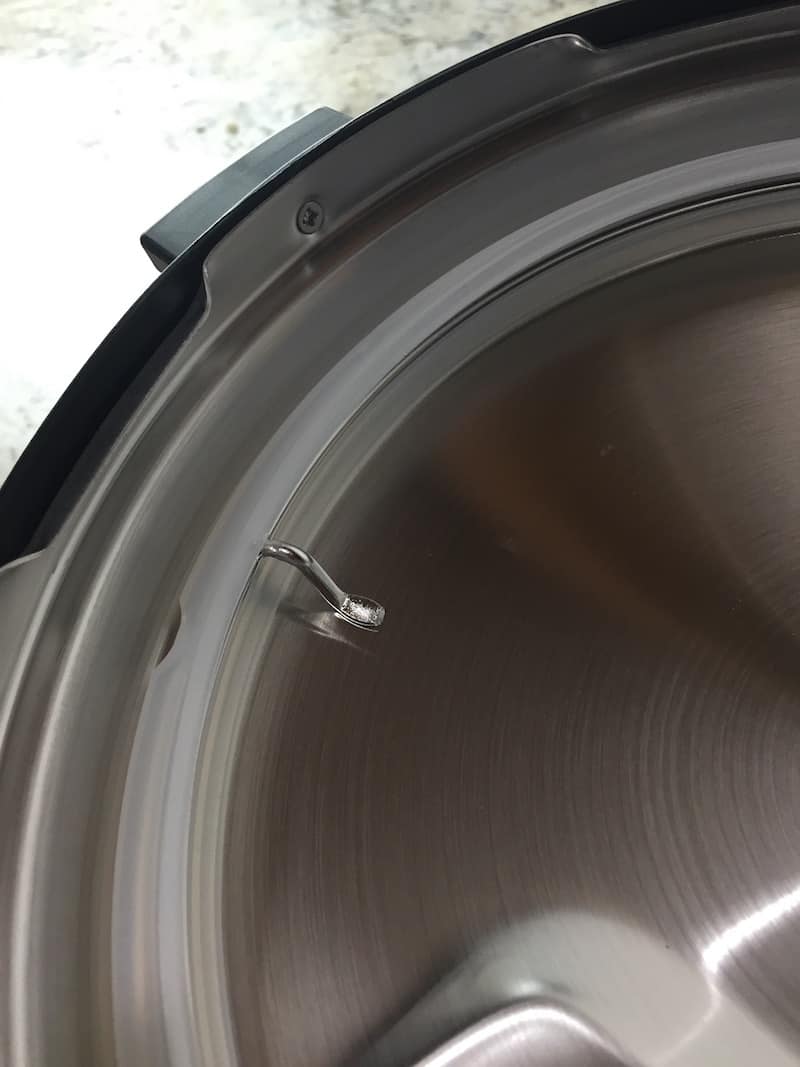
Unlocked Lid
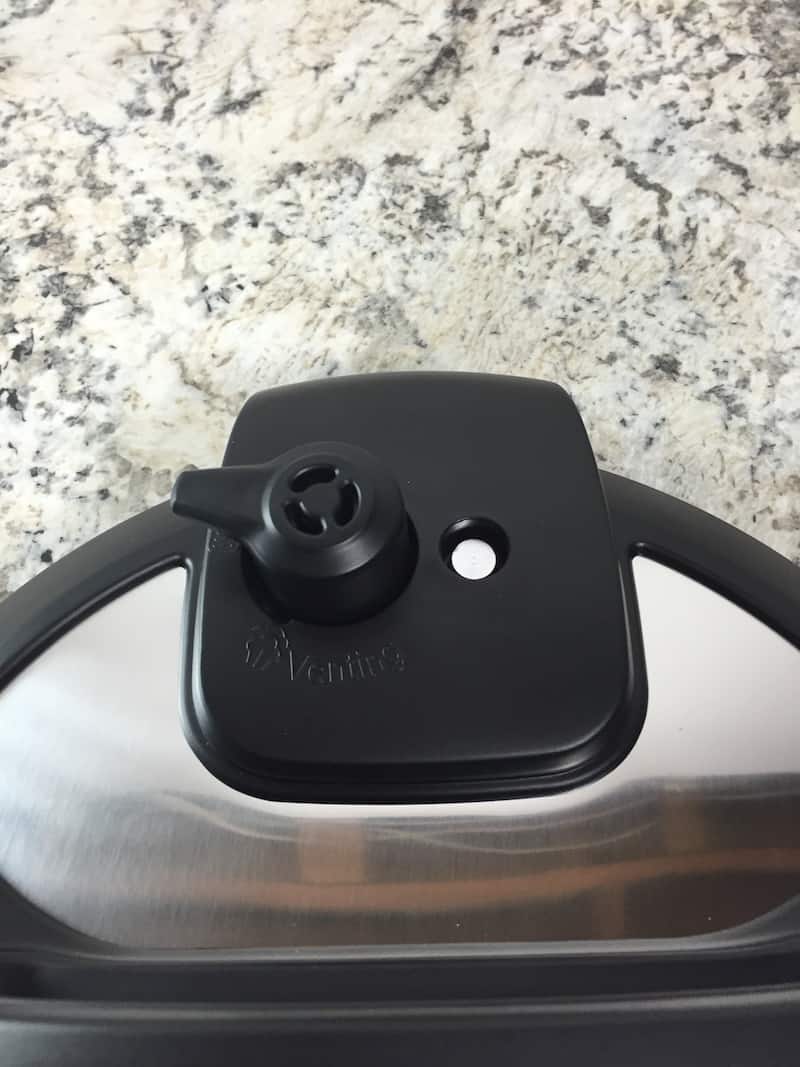
See that little metal valve to the right of the steam release valve? That’s the “float valve.” When the pressure cooker reaches pressure, this valve lifts into place, sealing and locking the pressure cooker.
In the photo above, the float valve isn’t in the lock position. It’s sitting down below the edge of the lid.
You want to get to know the two different positions of the float valve. Here. I’ll show you.
When cooking, the float valve won’t bounce up and down. The steam trapped inside the pot pushes the float valve up and seals the pot. In the video, I’m holding the lid in my hand and lifting and lowering the float valve by tapping it below the lid.
Locked Lid
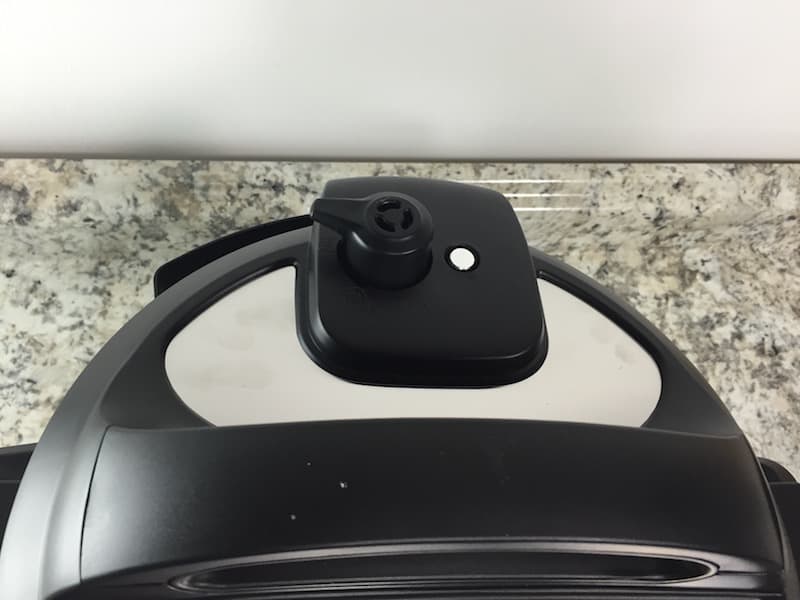
This is a locked lid. The float valve sits flush with the lid. You might be wondering how long the valve takes to lift into place. Good question! The answer is…it depends.
For recipes that contain a small amount of liquid (1 to 2 cups), it takes about five minutes for the float valve to rise. For recipes with a lot of liquid, like soups, it can take up to 20 minutes for the float valve to rise.
Once the float valve rises into position, the Instant Pot display should switch from “On” to a countdown of the cook time.
(If “On” remains in the display for longer than a few minutes, there’s a problem. If this happens, turn off the machine. Release the pressure by turning the steam release valve to “venting.” Allow the steam to release. Once the float valve drops, it’s safe to open the pot.)
Underside of Lid: The Sealing Ring and Anti-Block Shield
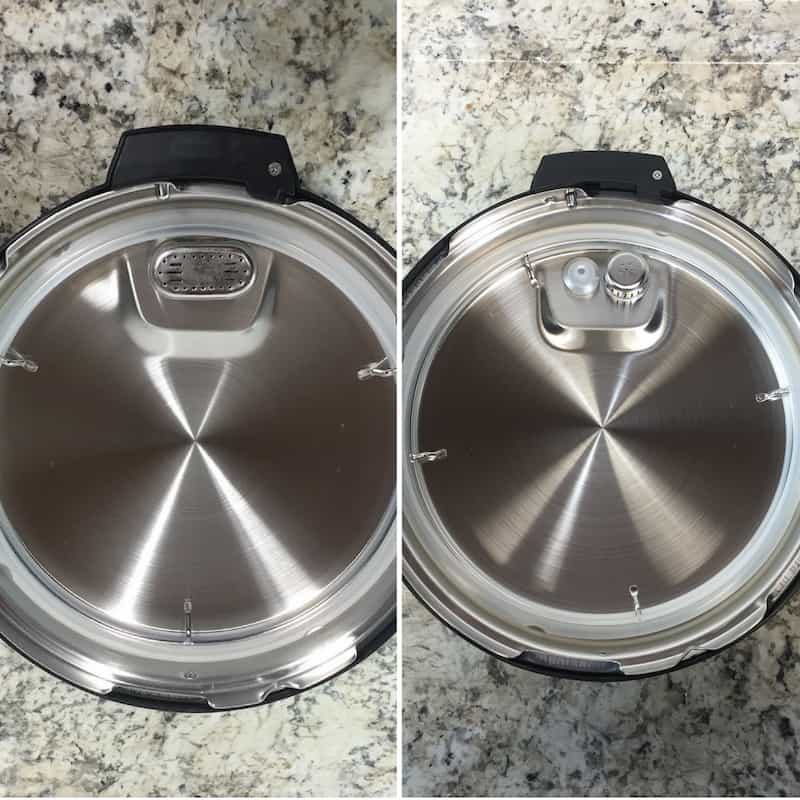
The underside of the Instant Pot contains four important parts. If you have version one DUO, it will look like the one of the left. If you have a version two DUO, it might look the one on the right. (I’ve seen a version two that came with a version one lid. So…flip your lid. Compare it to the picture above.)
The Sealing Ring
The plain-looking silicone ring is an integral part of the Instant Pot. Without it, pressure can’t build. During heating, the sealing ring expands to create a seal that allows pressure to safely build inside the machine. If the sealing ring isn’t inserted correctly or is torn, worn, or out of shape, steam can leak from the lid and the Instant Pot won’t seal.
Insert the sealing ring snugly in the wire sealing ring rack. When properly inserted, the sealing ring should lay flat against the lid and shouldn’t pull out easily if you give it a soft tug.
To remove the ring for cleaning, allow the lid to cool and then pull gently on the sealing ring.
To clean, use warm soapy water or run through the dishwasher. Dry the ring thoroughly before placing it back into the lid.
Even with thorough washing, the sealing ring can hold on to cooking odors. If you plan to make yogurt or desserts, like rice pudding, consider getting a second silicone sealing ring to use only for yogurt, desserts, and other mild foods. This way you’ll avoid making a rice pudding tastes like the chicken you made for dinner the night before.
Check the sealing ring before each use. To do this, run your finger along the ring to ensure that it’s in place. And when you wash it, give it a look. If you notice any flaws in the ring, replace it.
I like to keep an extra sealing ring on hand at all times. This way, if something happens, I can replace the ring right away.
The Anti-Block Shield
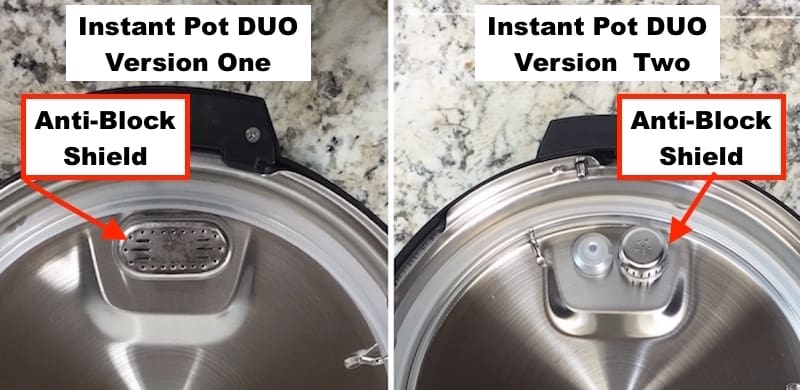
The anti-block shield prevents small foods and foam generated during cooking from clogging the pressure release valve and causing an unsafe amount of pressure to build. It’s an important piece. Don’t run your Instant Pot without it in place. Depending on whether you have a version one DUO or a version two, the shield will either look like a small oval cage covering both the float and pressure release valve or a small round piece just covering the pressure release valve.
(If you have a version one DUO covering the float valve, give the anti-block shield a forceful tug. It comes off for cleaning.)
Instant Pot Setup: Cooking Pot, Cord, and Condensation Collector
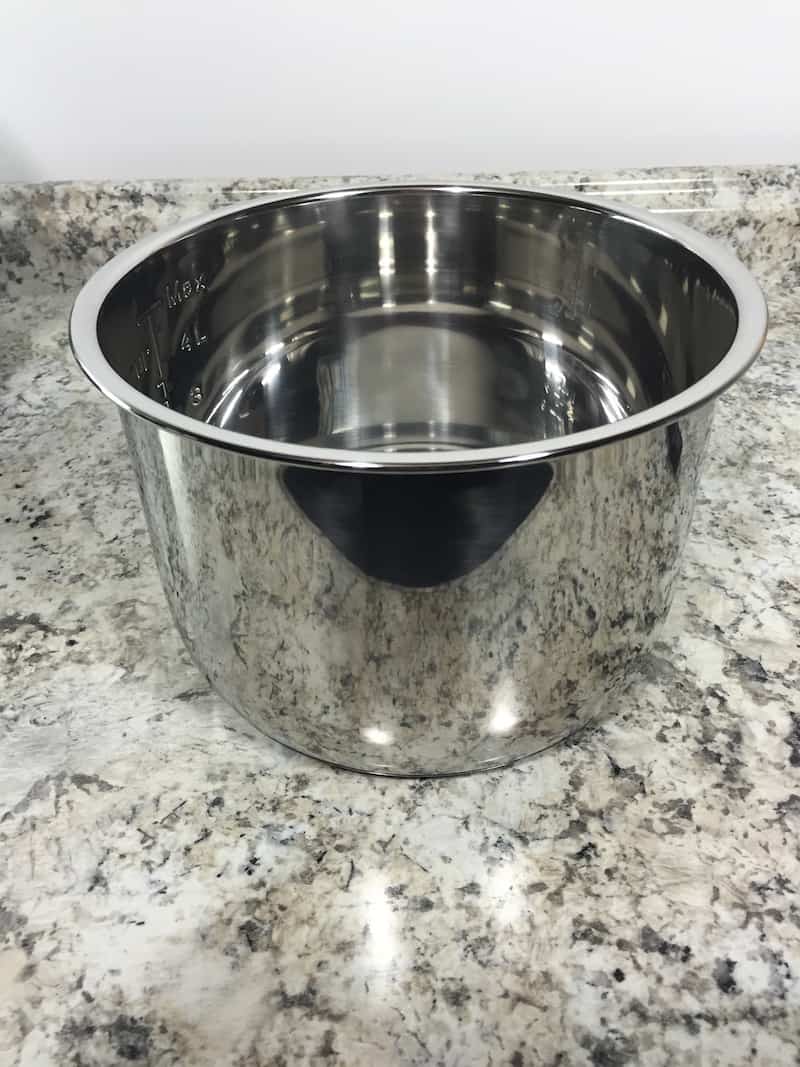
The cooking pot of the Instant Pot. This is where the cooking happens. You never want to run the Instant Pot without the insert in place.
With a three-ply bottom made of layers of stainless steel, aluminum, and stainless steel, the insert heats evenly. I love that doesn’t have a nonstick coating and that it handles sautéing really well.
There’s one problem with the Instant Pot cooking insert: the “max” fill lines markings are INCORRECT for pressure cooking.
When using the Instant Pot for pressure cooking, never fill the pot more than 2/3 full or 1/2 full if you’re making foods that release a lot of liquid. If a pressure cooker contains too much liquid, the hot liquid can spray out of the pressure release valve, causing severe burns. As long as you respect the maximum fill on a pressure cooker, you’ll be fine.
I find the markings to be very confusing and have reached out to Instant Pot to inquire why the “max” fill line is too high for pressure cooking, If I hear back, I’ll update this page.
To make cleanup easy, the insert is dishwasher safe. However, I tend to just add some soapy water and let it soak while we eat dinner. It wipes out easily even without a nonstick coating.
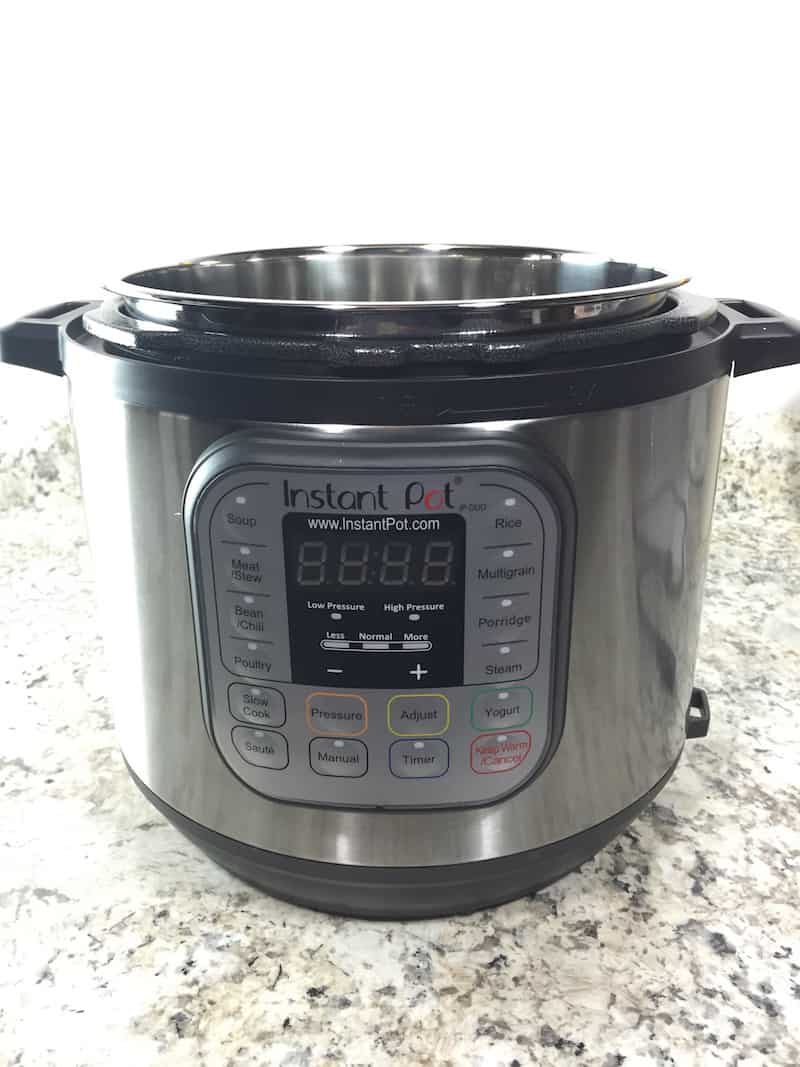
Ta-da! Here’s the Instant Pot with the Insert Pot in place. Now it’s time to conduct a “water test.” This trial run of the Instant Pot helps familiar you with how to lock the lid, set the pressure release valve, and complete a quick release of the pressure. It’s a helpful test and I recommend doing it before you cook anything in your Instant Pot.
But first…
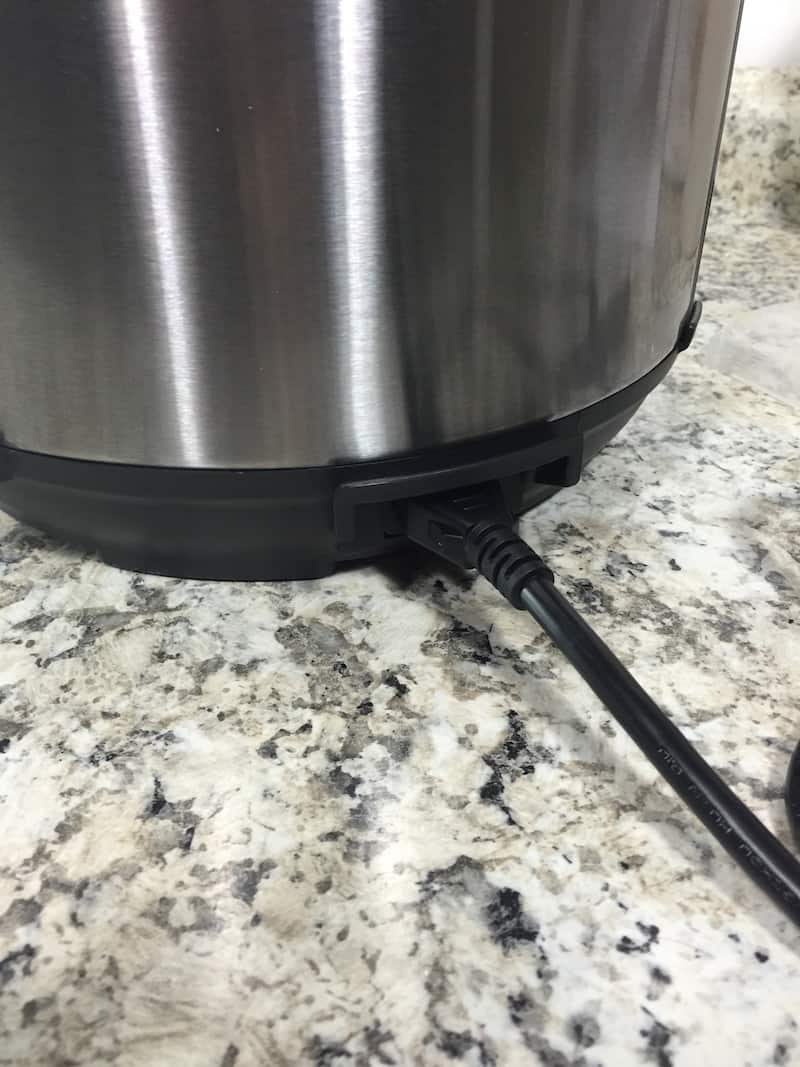
…insert the cord. In my experience, the pot doesn’t work well when it’s not plugged in. 😉 (Not all Instant Pot models have a detachable plug.)
Attaching the Condensation Collector
When you open the lid of the Instant Pot, some cooking liquid tends to run off the lid and into the rim that runs around the pot. It can be a pain to clean. To prevent this rim from overflowing with liquid, there’s a small hole in it. Under that hole, you can attach the “condensation collector.” Basically, a small cup that will hold excess liquid and prevent it from going all over your counter.
The condensation collector can be tough to install. You need to line it up with two slots and then push it toward the machine. To remove, pull it toward yourself.
With the cord and condensation collector installed, we can finally run the water test.
Instant Pot Water Test
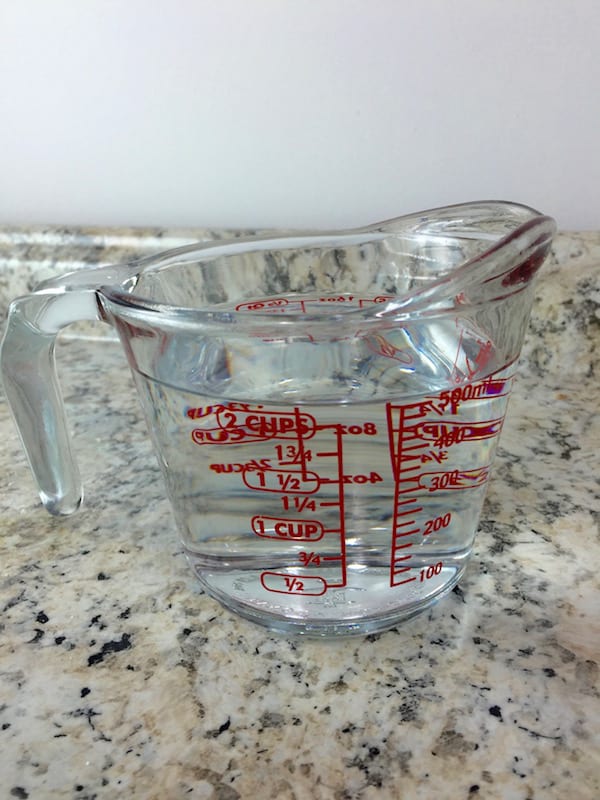
For the water test, you’ll need two cups of water. Regular cool water from the tap works just fine.
- Place insert into the Instant Pot.
- Pour 2 cups of water into the insert.
- Close the lid. It will chime when it’s closed correctly.
- Set the Pressure Release Valve to “sealing.”
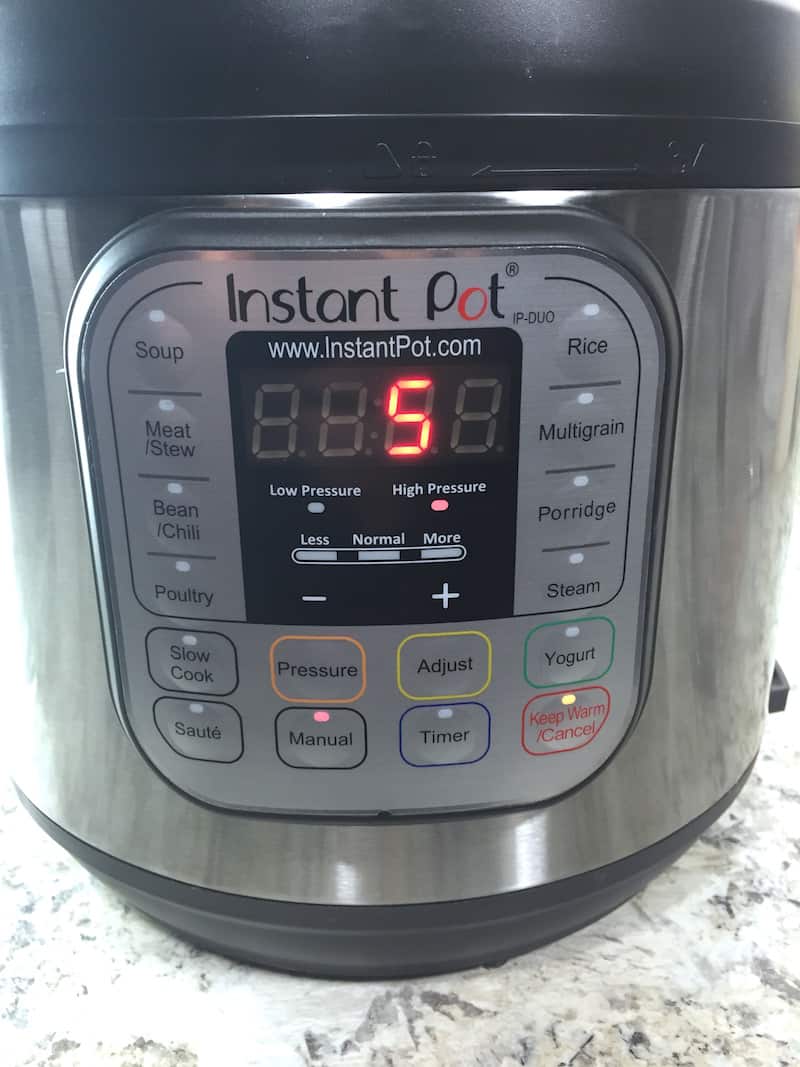
- Press Manual.
- Press the “-” button until 5 shows in the display. That’s it. The Instant Pot does not have a start button. After about 30 seconds, the machine will turn on. The display will switch from “5” (shown above) to “On.” The machine is now building pressure.
- After about five minutes, the float valve should lift into place. You shouldn’t see any steam leaking from the sides of the pot. Once the float valve seals the Instant Pot, the display will change from “On” to “5.”
- When the cook time completes, turn the pressure release valve to “venting.” This is called a quick release Be sure to keep your hands and face away from the top of the pressure release valve. Hot steam pours out of it. (see video below)
- Open the lid, away from your face, when the float valve drops.
- That’s it. You’ve completed the initial test of your Instant Pot!
Now that you’ve setup you’re ready to get cooking.
Why not start with one of these recipes?
INSTANT POT RECIPES TO TRY
Instant Pot Chicken Burrito Bowls The #1 recipe on this site. Try it and you’ll understand.
Pressure Cooker Mac and Cheese. So creamy. So dreamy!
Street Cart Curry Chicken. Loaded with flavor and SO easy.
Pumpkin Rice Pudding. We all need dessert, right?
Tan says
Thanks for the useful instructions! I am new to Instant Pot but wondering how the time display works? Is 12:50 12 hours 50 minutes or 12 minutes 50 seconds? I bought it to make bone broth so I would like to use the manuel button to set it, so I am a bit confused in what to press! Some websites asked us to set the cooking time for bone broth to 120…is that 12:00 or 1:20 on the instant Pot?? Thanks for helping!!
Elizabeth says
It depends on which model you have. Let me know and I can help you out.
Sara says
So, instructions super helpful but when I did my test run Steam releases the whole time… Am I doing something wrong?
Elizabeth says
Did the pot ever seal? It will release steam at the beginning and then the valve should lift, locking the pot.
Jen C says
Thank you for your clear instructions! I am doing my water test now but having problems…. There was steam coming out of the valve after about 5 min then it stopped. In total it took 17 minutes before the screen changed from ” on ” to “5”. Do you think there could be a problem with my element? I am just worried about trying food in there if it is not suppose to work this way. I have the instantpot smart-60.
Teacherbl says
By following your start up directions, I found that my first pot was defective, giving me a C1 error prior to ever using it! Exchanged it for another one today & successfully followed your great directions! I think I’m ready to go! Thanks!
Andrea says
Hi there, Thank you for your information! I have just set up the Ultra and I’m making my first pot of beans (high pressure). Is there a way to lock the lid closed? It seems very easy to open and I’m concerned a curious, hungry child could come in and open it right up and get massive burns…. Am I overlooking something? It seems necessary to have a lock on the lid!! Or maybe it isn’t easy to open under pressure and the pressure itself keeps makes it difficult to open?? Thank you for any info…and I apologize if you covered this already and I missed it.
Elizabeth says
Andrea,
Yes, the lid locks when it’s under pressure. However, as I’m sure you know, children should be kept away from the pot as it cooks and cools down.
Raj Singh says
Thank you so much for this webpage and tutorial videos. This has greatly helped with my initial use of my Instant Pot. I have clicked the Links on your page as a token of appreciation and I encourage others to do as well.
Agreed terrible manual, beautiful web page and informative videos.
Cheers from Canada.
Elizabeth says
Glad the information was helpful! Enjoy the Instant Pot!
Lynn says
Waiting on mine to arrive tomorrow – thank you for heading off frustration! Will be faithful follower here on out. Blessings!
Jane says
Really appreciated the how-to guide. So much more helpful than the official user manual. Tomorrow night I’ll be using your Chicken Curry recipe.
Elizabeth says
Enjoy the curry!
Nancy says
I just got my pot and was so excited to find this site. It appears, however, that the video content is missing. Can you reload it? I so want to be able to access all the great information!
Thanks!
Elizabeth says
Nancy,
Thanks for noticing the videos were missing! It was a glitch and should now be fixed.
Cindy says
Thank you for your site! I hate wasting food and feel your site will help as I get used to this so-called wonder appliance. I don’t know yet because I just finished my test run. I’ll know after a couple recipes ?
Elizabeth says
Have fun with it!
Barbara says
Elizabeth, this is wonderful! Thank you so much. I have already FB shared this. Happy Thanksgiving.
Deb says
Thec1stvtime I used my pot I made hard boiled eggs it said 10 minutes and 1 cup water but burn came up an the display? Can u help me to know why? Thank you
Elizabeth says
Sounds like the water might have cooked off. Not sure why this happened. 🙁
Pablo says
tried the water test on my Instant Pot Duo, followed the manual instruction, intead of from On to 5, it goes to 30. is that normal? now iam waiting to set by itself and venting it. i used 2 cups of water. now iam on 9 reading. i will wait till 5? and vent?
Pablo says
Iam doing it right?
Pablo says
now i release to vent. but the panel set to L0001 to 0005 going up. is this right instead of off?
Elizabeth says
If it’s counting up with an L, it’s on the keep warm setting. Turn off the pot and then turn the valve to safely release the steam.
Dan says
thank you thank you thank you for your instructions…I probably would have yanked off the anti block shield or gave up installing the condensation collector inside the pot. Probably the worst written manual I have ever seen in my lifetime. What recipe book or website do you recommend for the top instant pot recipes?
Sandy A. says
Thanks for the confidence building information. I’ve heard of people being afraid to take their new IPs out of the box for months, LOL. Got mine today, and you have me ready to take the water test without terror! LOL
Sandra says
I’m very glad to have found your site and this page – this post and the comments have set my mind at ease about what I was thinking about the manual – I thought it was just ME 🙂 I wish I’d read this page last night before trying to install the condensation collector – I did manage to get it done, but I was getting pretty steamed (pun intended!J) >:)
I did the water test according to your instructions, and now I’m feeling a lot less nervous about the machine. I’ve subscribed to your site through my blog reader, and have already bookmarked some recipes to try (OMG pumpkin pie spice rice pudding??!! I’m IN!) 🙂 This is going to be fun – THANK YOU!
Jeanie says
Help! I didn’ get a condensation cup with my IP. I didn’t know there was such a thing until I started seeing it mentioned in recipes. I have a version 2.
As many others have said, I wish I had found your site when I first got my IP. Great instructions. I’m sending your URL to my newbie IP user friends. And… I do love my Instant Pot. My most unusual recipe was a frozen turkey breast I made at Thanksgiving.
Elizabeth says
If you didn’t receive a condensation cup, I’d reach out to the company. I thought they came with all the models but I could be wrong!
Khushi says
God bless you. Thank you so much for explaining everything in such detail. Many thanks.
Cristina says
Got my IP for Christmas – still in the box. I briefly looked at the manual and made a 🙁 face, thinking ‘what in the heck did I get myself into?”….landing on your page was God sent! 🙂 You’ve reignited my IP happiness 🙂 and I can’t wait to try a recipe!
KJ says
Got the Duo Mini for Xmas, and was so excited as I read the manual – and then I tried to use it. I even call customer service, which helped a little, but not as much as your site – thanks so much.
One question – the first dish I made was your chicken soup (very delicious), but my IP seemed to take a loooong time to do the preheat (like 20 minutes) before the actual cook time of 10 minutes. Is that the norm or am I doing something wrong?
Elizabeth says
You didn’t do anything wrong. The time to reach pressure varies depending on the temperature of the ingredients and how much liquid is in the pot. The more liquid, the longer it takes to reach pressure.
Cat says
The newer models do not have a manual button, but another site recommends using Pressure Cook instead.
Elizabeth says
I’ll update this! Thank you!
Penny Aronson says
This was the BEST set of instructions that I found. Thank you so much for the help.
Janet Johnson says
Thank you so much! My Instant Pot was missing the manual, recipe book, and start-up guide. It does not show a condensation cup on the list of other things. Anyway, I was able to do the water test and now I feel I can use it – I was intimidated and left it sitting in the box even after I was so excited to get it! Now it’s out and I’m going to cook!
Elizabeth says
Glad it helped!
linda says
I read your instructions. Thanks. I am having problems with the steam valve. For some reason I cannot turn it to pressure it will only go on venting or stay in the middle. What could I be doing wrong?
Elizabeth says
Which model Instant Pot do you have?
Nat says
This site saved me too! I read the manual, could not reconcile what it was saying about the condensation collector or the anti-block shield, as my lid looked different to the one in the pic…
Your instructions and videos are perfect. You should offer to rewrite Instant Pot’s manual for them!
Am about to do the water test now, and try a dish afterwards.
THanks again!!!!
Ty says
Thanks so much–beyond helpful! 🙂
Kelly W. Jones says
Any company giving you commission for helping with the Instant Pot made a GREAT investment!!! You are an excellent guide!! Thank you. I had actually hit the return button and decided I’d give it one more try when I found you!!! I’m keeping it!!! Can I give you a list of other things I want to learn more about???
Elizabeth says
Hi Kelly,
I don’t earn a commission from any company for writing about the Instant Pot. I do it to help folks. (There are ads on the site that support my work.)
Yes, please let me know how else I can help you out! I’ll see what I can do. 🙂
Cindy says
This probably is a silly question but I can’t figure out how the steam rack works. I laid it in the bottom of my Instant Pot Ultra 6 qt. and it just about touches the bottom. Once I add the minimum 2 cups of liquid everything gets wet. Do you use this one or did you get a replacement one? I’m getting ready to order a steam basket but can’t figure out if I need a new rack as well. I read your whole blog but couldn’t see a picture of it installed. Thanks for all this useful information!
Elizabeth says
Hi Cindy,
Yes. Often the liquid will touch the steam rack. This is totally normal and not a reason to replace the rack. If you want your food higher, you could place a pan or basket on the rack. I hope this helps!
Joe says
Today is all about getting to know my new Instant Pot 6 quart Lux60! it’s sure a pretty thing & I love how thick & well made the stainless steel inner pot is. I’ve been the mustachioed cook & housewife at our house for the last 20 years & we’ve raised 2 girls to adulthood without a single case of food poison! Now, in addition to our 80-year-old Chambers cook stove, we have the Instant Pot! Thanks for your help. Without it, I was about to do the steaming water test for 28 full minutes. Now I know what I did wrong & stopped the test before I blew up our new best friend. Happy Steaming everyone!
Jeff says
Hello
We are having trouble getting it to seal. It seems like the mechanism is designed to prevent the float pin from rising. On the inside side lip of the lid is a rounded mechanism that pushes out the locking pin when the lid is twisted closed. When this is pressed in (from the inside), the float valve is unable to pop up. You can see a little metal lever slide in and prevent the float pin from rising when you push this mechanism in.
So, closing the lid automatically pushes in the inside button, which pops out the locking pin. this in turn prevents the float valve from popping up, so it never fully seals. It seems designed to PREVENT the float valve from rising, instead of the other direction where the float valve prevents the lid from opening. I cannot make sense of it, and we’ve never ever had it seal.
any ideas?
Elizabeth says
I’d contact the manufacturer directly.
Paula Bright says
I don’t understand how to set up the steam rack. Help?
I feel ridiculously stupid!
Elizabeth says
Hi Paula,
Which steam rack? (There are several different kinds.) Let me know and we can go from there!
Florence says
Thank you for all your work on this site. I’ll attempt this water steam part . Wish me luck all will work out.
Florence says
Thank you
Katie says
Just tested my new instapot following your instructions – thank you so much for the clarity and the videos!
Ron Richo says
Not all tutorials are created equal. This one is actually helpful and informative. Make that VERY helpful and informative. I will save this for future reference. Thanks a lot!
Evette O says
I love your page! You are correct the manual leaves a lot out. This is my first instapot and I wish I knew about it years ago. Here is my question what accessories should I purchase? I read recipes for bundt pans, cake pans etc. What do you recommend?
Also I am going to visit each of your advertisers. It is the least I can do for your hard work, recipes and instructions. I encourage all visitors to do the same.
Lorraine Kunze says
Oh my gosh! Thank you, thank you, thank you! I was starting to think I was totally unteachable and would have to bring my Instapot back to the store! Your video is great! Wish me luck!
Lisa Inglish says
Thanks so much for this! I’ve been looking at my IP for weeks now, somewhat intimidated. Once I could clear up the manual’s vague instructions on the Anti-block shield, I’m ready to roll!
Pam says
Thank you so much! I thought it was me. I’m starting the water test. It feels like such an accomplishment. The manual is so bad. No way I would use the pot with just the guidance (??) in the manual.
Steve Fricke says
I was given a IP Lux60 V3. I’m a little confused on the max fill lines, is that the max of liquid in the pot or max for all ingredients? My first recipe I want to try is pork carnitas, the recipe calls for a 3-4 lb bone in Pork shoulder roast, along with other ingredients such as onions, garlic, diced peppers and of course broth, OJ, lime juice. I would hate to buy a to big of a roast. Any suggestions?
Steven
Elizabeth says
I believe that the max fill line is for liquid. So if the meat pokes above the line, you should be fine.
Karma Pippin says
I greatly appreciate your beautifully laid-out Lesson 101, but my water trial is off to a bad start. I try to lock the lid, but clearly it isn’t working. When I turn it to “Close” it sings one tune, and when I turn it to the right, it sings a slightly different one. Either of these light up the screen, which announces “Off” then blanks out. I have the steam release valve at the wavy lines. And the little steam-catching pouch is in place.
What am I not doing?
Elizabeth says
The “tunes” sounding different is normal. When you close the lid are you selecting the “manual” or “pressure cook” function? It sounds like the machine isn’t being turned on. I think that will solve your problem. 🙂
Helen Cassidy Page says
Thank you so much for this wonderful information. I adapted the string for the test to my model and it worked perfectly. So many questions answered and I made perfect 2minute eggs for breakfast. However, I have arthritis in my hands and cat release the anti/clog filter. Too hard on my thumbs. Any advice?
Pam says
Omg! I bought the Duo Mini and was so confused on the directions. Then I found your site and you explained it so easily. The videos are so helpful because that steam venting when you release is a BIT startling! I can’t wait to cook my first meal tonight in it.
CHARLENE DONOVAN says
Dear Elizabeth,
Thank you SO very much for these detailed instructions and video. I totally agree with the lady who suggested that you rewrite the manual.
Elizabeth says
Glad it helped!
Dennis says
We have our first Instant Pot. It is the 8-qt Lux80 model.
We used it to make corned beef and cabbage tonight and it worked perfectly.
What is the function of the small plastic hook near the bottom of the outer pot? It is located at the side of the pot, below the condensation collector. The instruction manual doesn’t mention anything about this hook.
Elizabeth says
Sorry, I don’t have the model; so I don’t know about that hook.
Marla Hill says
Thanks for the detailed instructions. I’m still not sure if my water test worked correctly, but the float valve did pop up. There was just the sound of steam escaping the entire time, which I thought was odd. I used the pot a couple of times in California, but then I moved to 8,300 feet and thought I’d better test again. The pot got dented in transit, but everything I found online said that’s just cosmetic and doesn’t affect how the pot works. Just about every person who’s moved here and flown their pot in has had dents in the sides upon arrival, no matter how well it was packed.
Elizabeth says
Once the float valve pops up, steam shouldn’t be constantly escaping. I’d reach out directly to Instant Pot for help with this issue. Sorry I don’t have a better answer for you.
Mike Lane says
Hello
I have my new 6 qt IP out of the box and immediately came across a possible problem.
When I close the lid, it is loose and I can wobble the lid back and forth a little. Is this normal ?
I looked on the Q&A on Amazon and some yes and some said no.
I contacted Instant Pot customer service and they disconnected me from their Help-Chat service.
Thank You For This Site
Elizabeth says
Sorry, I don’t have an answer for you. I’d reach out to Instant Pot again for help with this question.
Lindi says
Thank you for your handy tips, got mine last night and was dreading the water test after reading the manual, but you took that dread fear away.
Sandra says
After a most unsuccessful attempt to do a test run on my new DUO60 V3 following the instruction booklet in the box, I found your site where every single thing was laid out so clearly and completely. My test run worked just as you said and I am now ready (I think) to try to cook something. Thank you. Now I am hoping that you have tried and true recipes posted somewhere!